
I love working with social media. The bite-sized snippets of information are such a great way to engage with customers and seems less invasive to me than many other forms of outreach. But while it’s a great way to promote content and discussion in a given field, it has one major drawback for me:
Keeping track of the calendar.
Calendars can get especially difficult when the workload is shared among multiple people, such as an agency and a client. Add in a graphic designer, freelance writer, and the client’s subject matter expert, and it’s even harder to keep track of. On top of that, it’s essential to promote your content at the right frequency while avoiding overlap or missing any important windows.
In this post, we’re going to show you how to create automated editorial and social media scheduling calendars in Google Sheets, all based upon a single date field.
Over time, I’ve tried many different tracking methods. I’ve created tasks in project management programs like Redbooth and Trello. This works alright for maybe 4-6 posts per month, and then starts getting excessive.
Sometimes it seems like I spend more time creating tasks than I do creating content.
I’ve experimented with social media management programs like Hootsuite. While these are still methods I love and use, I’ve found that they lack the planning aspects I need for a comprehensive look forward. I’m able to plan out across-the-board posts for a while, but then get stuck or overwhelmed with the upcoming months ahead.
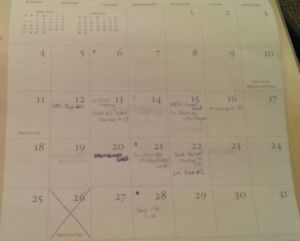
I’ve tried handwriting calendars and crossing off completed items. This isn’t too bad unless you need to start making changes, and then after multiple erasures or some crossed out pen – things get messy. (I don’t like messy.)
During a recent client project that required very specific social scheduling, these methods failed me again, leaving too much confusion from the client’s social team on what we wanted posted and when.
With all this frustration, I finally decided to just make my own.
One of many failed calendar attempts.
Social Media Posting Strategy
When creating a social media strategy, it’s great to start with a channel plan. You can start with our basic channel plan template, which looks a bit like this:
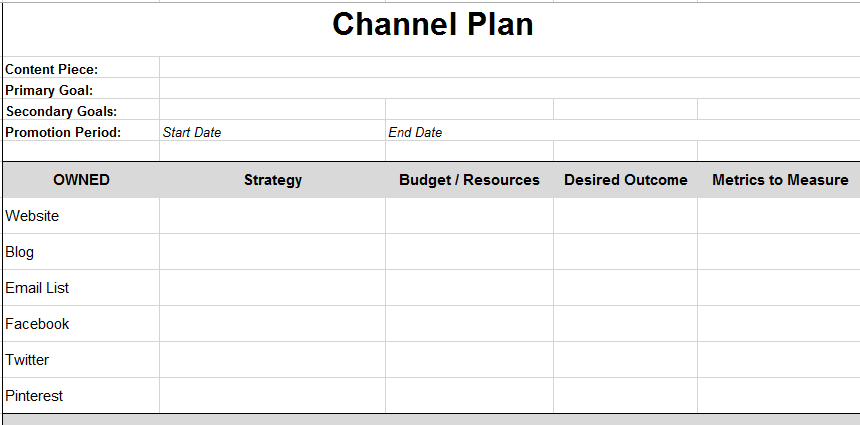
Identify the channels you want to use and list them. For this example, I’m going to use the following:
- Facebook Paid
- Facebook non-paid
While not specifically social media, I would also like to keep track of our company newsletter, and promote my new content when it sends. In this scenario we’ll assume that we only want to do one paid promotion per blog post, but would like two unpaid Facebook posts in addition to that. I’d like a larger presence on LinkedIn with 4 posts during the month of launch, and I want increased frequency on Twitter with 8 total posts in those first few weeks.
This will leave me with a frequency of 2 Facebook posts, 4 LinkedIn posts, and 8 Tweets. Since these can’t all post on the same day, I now need to lay out my timing.
The frequency of my posting schedule starts to look something like this:

In this graphic, +20 suggests 20 days after publishing, and +7 would be 7 days after publishing. This way we have a pre-established post frequency after a new piece of content is published.
Now that I have the number of posts ready, I need to assign who is going to post for what. In this scenario, we the agency will take care of posts on the day of publishing, and let the client handle secondary posts after that:
- Paid Facebook – Agency
- Newsletter – Client
- Non-paid FB – Agency
- Non-paid FB #2 – Client
- LinkedIn #1 – Agency
- LinkedIn #2 – Client
Each content title will be populated for the given fields. Our next step is to start building out our spreadsheet.
Combining Our Social Calendar With Our Editorial Calendar
For this spreadsheet, I wanted to take all of my social media data and integrate it with my standard editorial process. After all, the content creation timeline is the driving force of my channel promotion plan. By combining the two calendars, this creates a cohesive process where a single blog post entry on my editorial calendar will generate an entirely automated social media post schedule.
How it Works
Since the point of this spreadsheet was to save me the trouble of counting days on my fingers and typing the same thing over and over, I created some shortcuts for data entry.
Here is how to use the sheet:
- Enter a launch date in your primary calendar for Launch. This will auto populate all of the dates for a given title on the second tab (with the exception of the newsletter). Since newsletter dates may vary in a given month, column C will need to be entered manually.
- As social posts are completed, the agency or client will cross off completed items. In Google spreadsheets, this is Shift-Alt-5.
- Our goal is to not have to change any individual cells manually
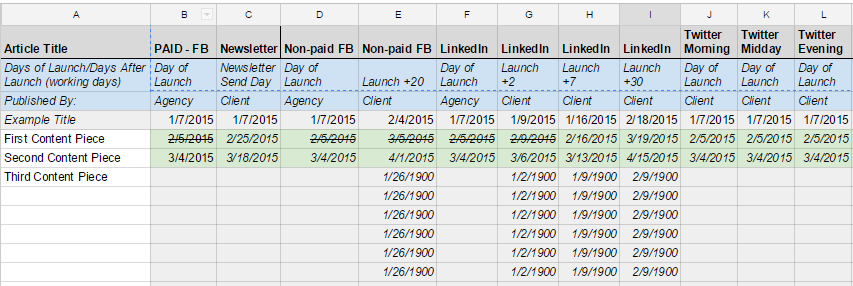
Tab 3 of calendar after setting target dates for first two content pieces.
You can get a copy of the calendar template online at Google docs. After viewing the document, just make a copy and save to your own drive. The document is available here.
Google Docs Formulas We’ll Be Using
In order to make all of these fields work, I used some easy formulas to create my days and times.
ARRAYFORMULA

This item was used to copy the dates from column B into each additional column that uses ‘Day of Launch’. Enter the formula in the appropriate column and then paste as needed. Double check that the cell given is reset to column B for each time you paste, as Google sheets likes to ‘help’ by moving along the sheet and substituting columns C,D,E, etc.
In a more complicated use of this formula, we take the editorial dates in Tab 1, and then combine them into Column B in Tab 2 from above. You can achieve this by typing in the same formula, then clicking over to the desired tab and highlighting a column (in this case Column C).
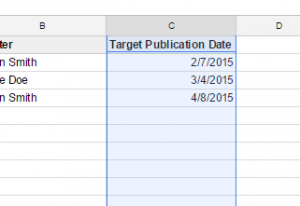
Date field on Tab 1 – main content calendar.
Hit return and then go back to your spreadsheet. The formula should appear like this:
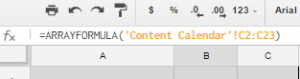
I repeated ARRAYFORMULA to transfer titles also. This may vary depending on your creative process. For more details on ARRAYFORMULA, check out the Google Support page here.
WORKDAY
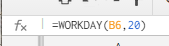
This formula is so handy, because it calculates workdays, and not simply number of days after a given time period.
Since many of our B2B clients want to target audiences during standard M-F workdays and avoiding posting on holidays – this function is ideal. Just enter the cell in column B with the correct launch date, then enter a numerical value for how many workdays after this date you would like to publish. For example:
A non paid Facebook post 20 days after content launch could be:

A Twitter post on the day after content launch could be:
CONDITIONAL FORMATTING
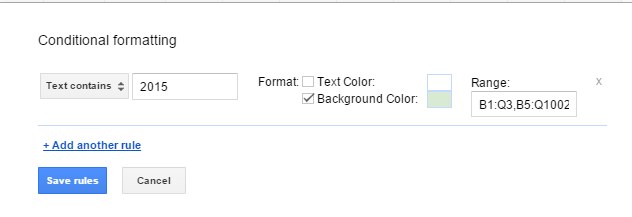
Another tool I’ve found useful is conditional formatting. For this sheet, I wanted to differentiate between the placeholder text showing the year 1900 and the correct text showing an assigned date.
At the time when I built this, I set up the condition so that items showing the year 2015 will turn green:

The gray cells highlight when dates are added, turning green to indicate they are ready for publication.
This is achieved by selecting the desired text field and going to the Format Menu>Conditional Formatting>Text Contains. I entered the given year, 2015 and selected text color: Green.
Other Potential Uses
There’s obviously a ton of ways you could utilize an automated calendar structure like this:
- Automatically building a content production calendar based upon a client start date.
- Automatically creating draft due dates for freelancers a specific number of days prior to target publishing date.
- Automating the process of generating dates at unusual intervals – like every 10 business days excluding holidays.
Keeping track of your social media channels and posting is a key phase of the content promotion process.
Take the time to develop your own system, or customize mine if you prefer. The ultimate amount of time saved will help in creating a measurable benefit in both cost and the amount of headaches in your future.
✉️ Get an email when we publish new content:
Don't worry, we won't bug you with junk. Just great content marketing resources.

Ready To Try
Content Harmony?
Get your first 10 briefs for just $10
No trial limits or auto renewals. Just upgrade when you're ready.
You Might Also Like:
- The Wile E. Coyote Approach To Content Guidelines
- Content Brief Templates: 20 Free Downloads & Examples
- The Keyword Difficulty Myth
- How To Find Bottom of Funnel (BoFU) Keywords That Convert
- Bottom of Funnel Content: What Is BOFU Content & 10 Great Examples
- 20 Content Refresh Case Studies & Examples: How Updating Content Can Lead to a Tidal Wave of Traffic 🌊
- How to Create Editorial Guidelines [With 9+ Examples]
- Content Marketing Roles
- How To Write SEO-Focused Content Briefs
- The Content Optimization Framework: [Intent > Topic > UX]
- How To Update & Refresh Old Website Content (And Why)
- 12 Content Marketing KPIs Worth Tracking (And 3 That Aren't)
- 16 Best Content Writing Tools in 2024 (Free & Paid)
- How to Create a Content Marketing Strategy [+ Free Template]
- How To Create Content Marketing Proposals That Land The Best Clients
- What Is A Content Brief (And Why Is It Important)?
- How To Create A Dynamite Editorial Calendar [+ Free Spreadsheet Template]
- How to Use Content Marketing to Improve Customer Retention
- Types of Content Hubs: 5 Approaches & 30+ Examples
- How To Do A Content Marketing Quick Wins Analysis