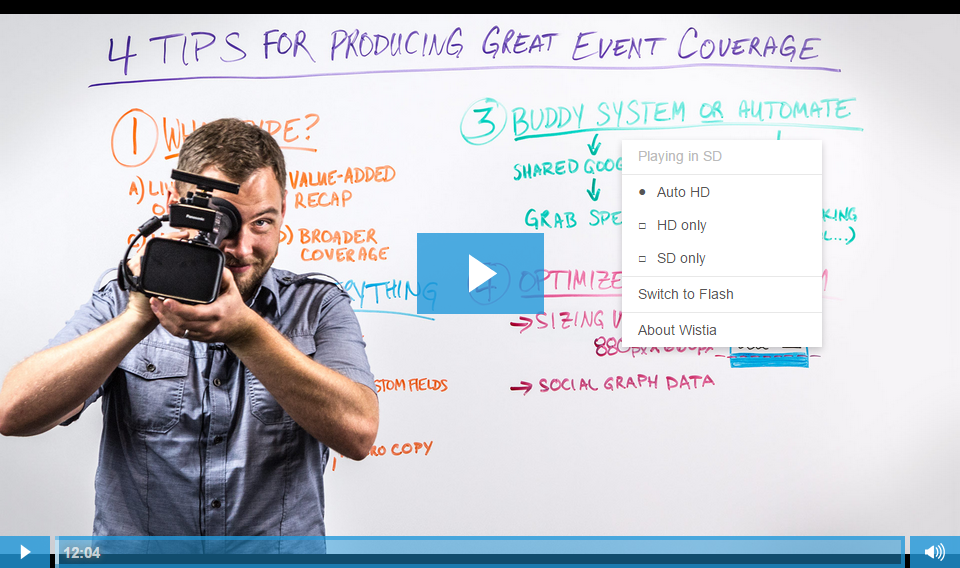
I’m a big fan of marketing with events. I’ve written in the past on Moz on the benefits of hosting your own events, I love hosting our local content marketing meetups here in Seattle, and last week they published my Whiteboard Friday video on “4 Tips for Producing Great Event Coverage” when covering industry events and conferences.
Here’s a bonus tip that didn’t make it into the video:
After the event, reach out to any of the speakers you covered, especially if you tried to quote them exactly, and make sure they’re happy with how they were quoted. Offer to update the graphics or quote if it could be improved.
They’ll greatly appreciate the gesture (nobody likes to be misquoted), and it’s an easy foot in the door to introduce yourself. Take the next step and see if they’d be willing to do an interview, collaborate on something, whatever.
The point is, take advantage of the visibility you just generated for your brand and build momentum from it.
Full Transcript
Hey, Moz fans. My name is Kane Jamison. I’m the founder of Content Harmony, and today I want to talk to you about four tips for producing really great event coverage. Specifically, I’m thinking of going to trade shows, conferences, those types of events and doing coverage for your company that’s focused on your industry, your clients, or whoever you might be wanting to attract.
1) Figure Out What Type of Event Coverage
The first thing when you get into this that you really need to decide is what type of coverage you are going to focus on. What most people first think of is doing live tweeting or live blogging. Both of those are all right. I have a couple of problems with them. Live tweeting is really short-lived. It’s great. You can build some followers, but unless you put it into Storify and then a blog post or something of that nature, it’s gone. It’s just in your tweet history.
Live blogging has a different problem. It’s there. It’s easy to access, but it’s your notes, and it’s not fun to read other people’s notes. Unless you are really good at encapsulating what the speaker is saying and putting it into a narrative as you’re typing, which most people are not, then it’s just going to look like a bunch of bullet points and somebody’s notes. I don’t really enjoy reading those a lot of the time. I have done them both in the past and come across these problems.
The next stage that a lot of people will think of is what I would call a value-added recap. This is after the event, you go back and you write a narrative of what the themes were for the event that you were at, where your industry is trending, and you recap some highlights from individual speakers. This works really great. But usually after three days at a conference, I’m really lazy. I want to catch up on sleep that I’ve missed. I don’t want to spend time writing 2,000 words about what happened at a conference that I just attended and putting all of my notes into a blog post. These can work out great. I’d refer you to Matt Gratt’s, from BuzzStream, 2013 MozCon Recap. That’s a favorite of mine for somebody who did a good job of pulling a lot themes together on an event recap.
What I prefer doing, and what we’ve done for MozCon at Content Harmony the last two years, is what I’d call live visuals or a visual recap. Live visuals, I mean Twitter images that are coming out on Twitter almost live with what the speaker is saying. A visual recap, another method we’ve used is putting quotes and speaker highlights into a SlideShare deck for each day of the event, so that users can look at those slides, paw through them, and see the event highlights in a visual format rather than trying to read a long form blog post. That’s my favorite and what I’m really going to focus on today.
There’s another fourth format that I have less experience with, but want to highlight, because if you have the manpower to tackle it, it’s another great way to produce some visibility for you and your company, and that’s just broader event coverage. A great example of this would be going to an event and filming Q&A and interview sessions with event attendees and maybe speakers as well. You might be talking with the speakers about what they are talking about on stage and kind of continuing it off the stage in a more casual format. You could just be asking people about their take on the speakers. Really, you’re doing coverage that’s less focused on what’s being said on stage and more focused on who is there and what they think about everything. That’s great, and it’s a good way to meet people you want to talk to at the event as well.
As you’re getting into something along the lines of live visuals or a visual recap post, you want to do your best to prepare everything that you can in advance. Specifically, you want to prepare everything except for what the speakers will actually say on stage. Anything that can be known in advance, you want to have that done, so that when you get there the first day, you can sit down, start typing notes into whatever your medium is and hit “Publish.” You don’t have to worry about formatting and all these other little quirks that come along with content assembly and creation.
2) Prepare Everything!
The first thing, especially if you’re going to be doing anything visual, is to have all of your graphics prepared in advance. For our coverage for MozCon 2014, we did live Twitter images. We had all of our Twitter images, everything except for the actual quote from the speaker, prepared in advance the week prior that we worked on with our graphic designer.
If you don’t have a graphic designer, that’s great. That’s okay. There are easy ways to get around that without having a lot of design skills. My favorite is to just open up PowerPoint, use a nice looking color and big white or black font for your titles. Just type whatever you want into the slide. Right click on it, click “Save as Picture,” and you can save that slide as a 4×3 JPEG, which works great for Facebook and Twitter, without having to pull some graphic designer in to help you. So it makes it really easy to produce nice looking visual coverage on the spot, save it, publish it, and you’re good.
The next thing you want to do is pre-build your post. We like to host everything on one URL that people can tweet and share and come back to after the event. If you’re doing this in WordPress or whatever blog, CMS, you want to pre-build everything that you can. For MozCon, what we’ve done is we’ll have an introductory text about what it is. We’ll have our image in the top right. We will have H2s down the page, marked up for the titles for every speaker name, their session title, and we’ll have jump links created like you would see in a table of contents on Wikipedia. Somebody can go to the post, click on the speaker name, and they will go right down to whatever the notes or highlights are for that speaker.
We can build all of this the week in advance. We know what the speakers’ names are. We know when they are going to be talking. We usually know the name of their session or what they’re presenting on. All of this can be built out before we ever get in to the city or town where the event is actually happening. Getting all that done makes it a lot easier to sit down, start taking notes, and really do what matters, which is recording what the speakers are talking about.
The third thing you want to have handy while you’re working is what I’d call a notes clipboard. This is just a quick, one-page text document that has all of the hashtags that you’re going to use, all the URLs, like the short Bitly links to the posts that you’re writing, and then finally micro-copy, so maybe 40 or 50 character type little bits that you will keep copying or pasting into Twitter or wherever else that you are sharing content. You know you’re going to use this throughout the day.
The example for our recent MozCon coverage would be “See more MozCon coverage at” and then the short link to our post. MozCon was already a hashtag, so I know that it’s going to be seen in that feed. Everything is all pre-built. All I have to do is around a hundred characters of custom content, add the photo, paste in our little suffix to the tweet, hit “Publish,” and I’m good to go. I can move on to the next one. Having all of this prepped makes things a lot easier when you’re actually there and live.
3) Use the Buddy System (or automation if you’re solo)
The third thing you want to think about is how exactly you’re going to take notes and record everything across a few days of speakers talking. The best way to do this to use a buddy system. Have one person that’s taking notes, recording everything that’s going on, taking down URLs, taking down quotes and tools mentioned by speakers, and have an opened, shared Google doc between the two of you so they can be taking notes in a bullet, and you can be taking those notes and publishing them either to the blog or to Twitter or wherever you might be doing the event coverage.
The backup option, if you don’t have the buddy system, or even if you do and you want more comprehensive notes, is to automate the process. Zapier is a great tool, very similar to If This Then That, which most of you are familiar with from past MozCon content. Zapier allows you to take tweets for a specific hashtag and push them to a Google doc. Every time there is a new tweet, it will push it into a new row of a spreadsheet, and you’ve got full, live, automated robot notes coming through Twitter. If you miss a link that’s shared, if you miss a quote, you can capture that from somebody else. If you do this, I highly recommend thanking the people on Twitter that helped you push through those notes, mentioning them in your posts.
The final thing, regardless of whether you’ve got a buddy or whether you’re automating the process, is to just grab the speaker slides while they’re talking. It’s kind of cheating, but as long as you don’t get ahead of yourself, it’s a really easy way to rely on what the speaker’s putting out in their slides. Whether they’ve tweeted a SlideShare link or mentioned a Bitly link on stage or whether the event has actually published a link to it, you can grab these, follow along while they’re talking.
If you do this, you have to be careful not to get ahead of yourself and just start copying things from slides. You’ll be sitting there. It’ll seem easy to do so because it’s right there and it’s easy for you to get ahead. The problem with this and the danger is that you’ll miss the context of what the speaker is actually saying. If you start putting out notes that are based off of the slides and not based off of the speaker and what they’re actually saying, that’s the fast track for danger and getting called out by somebody for publishing something that the speaker didn’t intend, from what their slides may look like they meant to say. So be careful with that. Don’t abuse it. But it’s a great way to get backup notes while you’re trying to take live quotes and coverage.
4) Optimize for the Medium
The fourth and final thing that you need to focus on is optimizing for the medium. Specifically, the example I want to use is Twitter images, since that was our most recent focus. In advance, you want to create some kind of personal or fake Twitter account that you can do some testing on. You want to make sure that visuals are sized exactly the way they should be. After a lot of testing with our graphic designer and reading blog posts about ideal Twitter sizing, what we settled on, for MozCon 2014, was 880 pixels wide by 660 pixels tall, a 4×3 ratio, and an image that would scale down nicely on Twitter and look good.
What we did with that is create a header and footer that had information on MozCon and information about the speaker title and a URL to go find more information. In the center, we had the actual quote from the speaker, the speaker photo, and name. The reason we did this is from these cut lines you see, in feed when somebody is scanning through a hashtag or their own feed, they will see a smaller, cutoff version of the image that is more like a two to one ratio of width to height. We designed it in a way where they would see a nice slight border on the top and bottom of the image. The only thing they would see in their feed is the speaker, name, photo, and the actual quote from the speaker. The real substance, we’re not forcing the MozCon imagery or our own logo and links on them each time they’re looking through their feed. They’re only seeing new stuff, even if they’re seeing a lot of these images.
If they do click on the tweet or if somebody links them to the actual tweet URL, they’ll see the full header and footer. They’ll know where it came from. They’ll know what the event was, and they’ll know where they can find more similar images.
Another nice part about 880×660 for us was that this image size worked well on LinkedIn. It worked well on Facebook. So we could reuse the same image on other mediums as we were going as well.
The other part about other mediums is even if you’re focusing on one, like Twitter, you need to optimize your actual posts across a number of mediums. LinkedIn, Facebook, Twitter, Pinterest all have their own graph metadata that goes into a post. You need to make sure, before the event even starts, that all of this is perfectly optimized in your CMS and that when you share this on different social networks, it’s going to look great. People are going to want to share this content for you, and you want to break down all the barriers that are in their way to doing so. Make sure that all the descriptions look nice, titles aren’t cut off, images are properly sized for each social network, and you’ll have a lot better time getting coverage from industry peers and people that want to share that content.
Thanks for your time. I’d love to hear more feedback on what you think could improve a live event coverage and other tips and ideas in the comments, and have a good one Moz fans.
✉️ Get an email when we publish new content:
Don't worry, we won't bug you with junk. Just great content marketing resources.

Ready To Try
Content Harmony?
Get your first 10 briefs for just $10
No trial limits or auto renewals. Just upgrade when you're ready.
You Might Also Like:
- 10 Email Marketing Tips for Content Marketers
- Content Marketing Budget Examples For All Business Sizes
- A Complete Freelance Hiring Checklist For Marketers
- 5 Skills Brands Need To Learn From Publishers
- Email Split Testing Ideas
- How To Optimize eCommerce Product Pages
- How To Optimize eCommerce Category Pages
- This Is What Great Content Looks Like
- Content Success Factors for SEO
- Keyword Research for the Complete Customer Lifecycle
- 8 Reasons Journalists Make The Best Content Marketing Writers
- The Hourglass Sales Funnel
- eCommerce Blog Examples That Can Actually Generate Sales
- What Is A Content Brief (And Why Is It Important)?
- How To Update & Refresh Old Website Content (And Why)
- How to Create a Content Marketing Strategy [+ Free Template]
- How To Create Content Marketing Proposals That Land The Best Clients
- How To Write SEO-Focused Content Briefs
- How To Create A Dynamite Editorial Calendar [+ Free Spreadsheet Template]
- The Keyword Difficulty Myth